Monday, January 31, 2011

playing with (bugs) stamps again


Don't ya just love bugs! except of course when they start to eat things they shouldn't but they are really so cute and have survived for such a long time. SU has a stamp set called Bugs and Kisses and I finally circummed to buying it. Have coloured the lil bugs with SU markers. Just on paper at the moment but I will now have to do some buggy cards.

Aviary Stamp set SU


Love this little stamp set from SU called Aviary it is soo sweet. I might add a sentiment thats says 'Soo Tweet'

More Playing

Flower from Elements of Style stampset from SU. Coloured with SU markers.

Playing with Stamps


I made a card from the flower in the SU stampset Happiness Shared. the flower is coloured with SU markers and glitter and bling added.

Saturday, January 29, 2011

Wednesday, January 26, 2011

Golf Card


My BIL had a collapse on the Golf course and isn't feeling the best so I made him a get well card with a difference. He loves his golf so I used the cuttlebug golf embossing and die cutting folder to make him the card. I put a verse inside but as it's a bit raunchy I will not add it to the post but I know he will get a laugh from it.

Welcome to New Zealand card


My sister is hosting an foreign student so she wanted a welcome card. This is what I came up with.

Saturday, January 22, 2011

A Great Grandaughter


Pictures are great scrapbooked but they are not on display and we all love to display our pics of our beautiful family. My Granddaughter is beautiful and her Great Nana thinks so as well as her Great great Aunty Pat so I took the opportunity to buy a frame and decorate it. I used a yellow green and may go back and chalk the feet and wording to make it stand out more. Love the development with the frames.

Picture Frame for Nana


nana really loves her pics of her grandson Paul and his family. Especially the 2 of 'the little man' I wrote their names on them using the cricut and Lyrical Letters. Also put the years in the centre so we can remember when.

Picture frame Name


Pictures in frames are great but who are they? My daughter and her cousin both ride horses and nana has pictures of both of them. So I took the opportunity of putting Dawn's name on the outside of the frame and where she was at the time of the pic. A great memory jogger for Nana and great for anyone who can't tell the girls apart. The wording was done with the cricut and Lyrical Letters. My neice Dawn was riding the range at Akaroa.

Nana's Birthday Cake


Nana's cake was put together very quickly with Hoppy that matched her birthday card. The trouble was that it was so hot the icing kept melting and running down the sides. But it did taste very nice. Hoppy was layered with brown, red, pink and white fondant and Hoppy Birthday was written in fondant.

Thursday, January 20, 2011

Nana's Birthday


Its Nana's Birthday and she is 85 Wooo Hooo Nana

Name badge


People ask what I do with the critters. Well sometimes I make name badges like this one. It is for a very special person and when the pic was taken her name had yet to be added as I would like to protect her privacy. But it is cute. It is the size of a credit card so she can put it on her name badge.

Cupcake box


This little cupcake box is sooo cute I just had to make it. It comes from a free printable from http://printsofjoy.com/ so I am sure you will pay her a visit to see the other things she has on her site. In the mean time this little box is very cute and I gave someone a special present in it. As she is diabetic I put in an orange for her.

Monday, January 17, 2011

More Lil Critters


Mushroom on Shift pg 32 Badger pg 33


Squirrel pg 32 Snake pg 30


And this is Duck on pg 31 and this is all of them. Critters cut at 2 inches

Fixing problems by inking edges


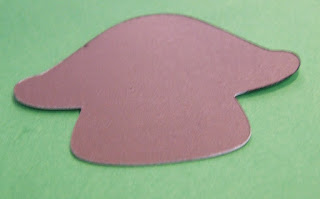
When I cut these on the Imagine I again noticed that the white edges show so after my last post decided to show the difference that inking the edges makes. In the pics above you can see I have started to ink the top but the bottom you can see the white showing on the bottom edge. The pic below is once I have inked it all the way round. I inked the mushroom in black as I wanted to give it some extra dimention.


Here on the top of the mushroom the Imagine didn't quite line up so as I had used the RGB colours for a StampinUp colour I used the StampinUp ink to ink the edges and also to fill in the white space. If you are thinking it is not a good colour match as you can see the ink this is also how it looks on the real SU cardstock when you ink with the same colour. It is a nice way to add depth to a project (and to fix mistakes).