Friday, December 31, 2010

Happy New Year


I have made these for the staff that will be working with me tonight on Night shift.
I made these from the Imagine Better together cart and made the HNY from wildcards coloured and cut it on the Imagine. The scalloped oval is 4x2 inches and I cut the HNY at 0.7 x3.3 which the Imagine went to for 0.7 high it is very small but cut well and I love that I could colour it on the Imagine. I have a gypsy and have not used the carts in my CE so it is very new to me to have to find the carts to design with. roll on update of gypsy.

Saturday, December 25, 2010

Santa from Paper Dolls


This Santa face was cut from the Christmas Cartridge and is about 8" wide by 10" tall


I made the Santa head and thought it may fit the paper doll body but it just didn't look right so made a paper doll Santa. Oh easy but no I had to be difficult. I had cut the clothes out so the Santa would be around 24 inches high then I realised I needed to cut out the paper doll base. I enlarged the paper doll base and found that the arms and legs didn't fit the 12 inch wide mat so with gypsy's help I rotated the image and cut it in 2 halves so my Santa is 24 inches tall well he is actually a bit taller than that but I do think he is cute. I used a silver ink pad to ink the edges and I love the effect of him hung. We don't have a fireplace in the loung so I hung him by the TV. The face is an adaption of the paper doll faces by Bonnie the links are at the top of my blog.

Thursday, December 23, 2010

Box on Imagine Snow Angel Cartridge


This is such a cute little box But if you look at this pic carefully you can see the bleed area is inside the cut area. for those of you who are unsure what I am talking about it means that there is a white area inside the cut. It improves if you set the Imagine to have no bleed area. Check the pic at the below I have red dotted lines where I think it should be cut and cut like this it goes together well.


This pic shows where the cut area should be and in the box I completed at the top I reset the settings to custom Border prefs =0 and then my triming was just to make the diagnonal lines meet the horozontal ones. I made the first box at 4inches and the box turned out 1 1/2 inches high the one pictured at the top is made at 9 inches and the box turns out 3 1/2 inches high.

Even with tweeking this box it is still sooo cute. I haven't added the tags to it yet. I note there are the same taga as on the side of the box but have yet to work out the size that these would need to be made.

Monday, December 20, 2010

Crafters anonymous Sunday Challenge


Crafters Anomymous has a new Sunday Challenge each fortnight and I am a bit late with this one but it was set by Janet who said we needed to use 2 items from our stash. Well I made a christmas decoration using some red paper I have had forever and to put it together some christmas sellotape in green. Check out Crafters Anonymous

Sunday, December 19, 2010

My Christmas Tree 2010

I have today set up my christmas tree. I bought this tree some years ago and love it every christmas. I love lights and currently it has only 2 decorations on but mostly lights and more lights. Some of the lights are so tiny they have been eclipsed by the bigger ones but I love it so it is going on my blog.

Sunday, December 12, 2010

Lions and tigers and bears Oh NO!


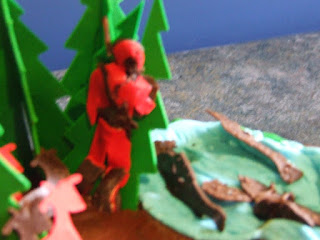
Hunter in red clothing


deer in the trees, boy fishing


the hunter with his red clothing and gun slung over his shoulder


boy by the rocks fishing fish in the lake


back of the cake deer hiding behind trees


Different views of the cake.

My wonderful Son in Law Jarred's birthday was Friday an as he turned 30 they had a party. My daughter decide to tell me very late Friday night that he didn't have a cake!!!!! Could I make one and gave me the recipie for a mudcake. Now I have never made a mud cake except when I was real small and they were actually made from mud! Well she gave me a wonderful recipie that she said was a never fail one. it came complete with directions for the icing as well. So after going to town to get the ingredients I came home and 'whipped up a chocolate mud cake' actually it went really well and the cake tuened out beautiful. It actually tasted nice as well. While it was cooking I thought of the design I needed to do for Jed. A real kiwi bloke he loves hunting and fishing and although we tease him about his bambi shooting he does love his hunting. On this theme I decided to do some 3d trees deer fish and a hunter and fisherman. Well now if this was in paper it wouldn't have been so bad but having said I would do a cricut weekend and having a Cake I thought I would do it all in fondant with the Cricut Cake. Well roll out the fondant and really that went well as well as getting it on the mat. I cut the 3d trees, the deer, the hunter, the fish and the little boy fishing then left them to dry which I did think they would do fairly quickly but I hadn't bargined on the day being so hot. Well to cut a long story short I glued the trees together with sugar glue poked the deer in the mud round the trees made a lake from the blue fondant I made and put the fish in it stood the hunter by one of the trees and voila it was done! (well not quite that easy but yep it was done)

Monday, December 6, 2010

Son & Grandson birthdays in December


With a son and grandson in Canada both with birthdays in December I figured I better make them some cards. the dog is from Imagine Best Friends, the truck is from B is for Boy and the sentiments are from Birthday Bash. the scalloped ovals were cut from a die and the outlines were done in sparkle ballpoint. Stamps are from StampinUp.