This is my scrapin Blog where I am going to keep all things I scrap about. I have discovered I love papercrafting and making things from paper and card. I have done crafts for years but have no record of them. Now I have decided it would be good to keep a record, so I am going to keep a record of everything I make so when I am forgetful I will be able to come back and go through my blog for a memory jog.
Sunday, August 25, 2013
Death by Chocolate
Friend Raine wanted a coffin so while I was over there playing we made a coffin from the Artiste Cartridge. I so enjoyed playing and watching how Raine had decorated her coffin that I cased the idea and have done this one. The Coffin & the skeleton are from CTMH Artiste the bones are from Indie Art and Nate's abc's. I used the wood-grain embossing folder from sizzix and sponged the embossed areas with SU chocolate chip and the bones with crumb cake. The finished coffin measures 7 x 3.5 x 1.75 inches. I used CCR to cut it and the size on CCR was 10 inches which with the lid as well fit on a 12x10.5 sheet of paper.
Tuesday, August 13, 2013
Saturday, August 10, 2013
Cradle from Baby Shower
This is the 3d cradle from the baby shower cartridge. Was doing a diaper card for my daughter and found this cradle so just had to make it.

Wednesday, July 31, 2013
3D Ferris wheel from Cricut Artiste Cartridge
I love making 3D things and when I saw the Ferris wheel on the Artiste cartridge I couldn't resist making one. It is not 3d on the cartridge but with a little bit of work I made it so. I cut 2 of the wheels and 2 of the stands and then cut 16 carts and put them together either side of a small box that was also on the Artiste cartridge. The base is just a straight piece which I have attached the legs to. The wheel turns and the carts swing.
Thursday, May 30, 2013
Iron On Vinyl Sparkly style
This weeks Bitten by the Bug 2 challenge was Life's a Zoo. I have been playing with the sparklie Iron on vinyl and my DGD loves unicorns and when she went to the zoo she said "there were no unicorns, Nana" so I just had to make her a T shirt with unicorns.The unicorn comes from the pixie button on PDDU and the grass from CAC edited on CCR to make it the right size.
these 2 pics show how sparklie it is

Tuesday, April 23, 2013
McQueen from Cars
So many of the things I do are to try something out and this time its the Disney/Pixar Cars cartridge by Cricut. McQueen the car on button 5 had some very small cuts in it and Raine and I were looking at the size it needed to be cut. Raine had cut it with a size of 6 inches and this makes him 11 inches long. Having said that some of the fine detail is still only a hair thickness and would not cut on a smaller size. But mostly I think you wouldn't notice so much on a smaller size or you would put the detail in with pens. Now this is what I will try next but this time I have made the Shadow in black, the base in red card stock, the top is Red sparkle vinyl the yellow is cardstock, the silver gold and blue are all vinyl and sitting on my wall he just sparkles. When I did the base in Red there are areas that need to be black so a sharpie marker did the trick.
If you are interested in learning how to use the cricut go to this link where you will find the details on a Cricut E2 Education weekend. Click here.
Sunday, April 21, 2013
covered note book
This is the end result of a competition for covering a note book. We could only use the things that were in our kit that we were given. this is what I came up with. I hand cut the flowers using the same type of circle that the Cricut uses and it worked quite well.

Cricut can't cut THAT!!! Oh YES IT CAN
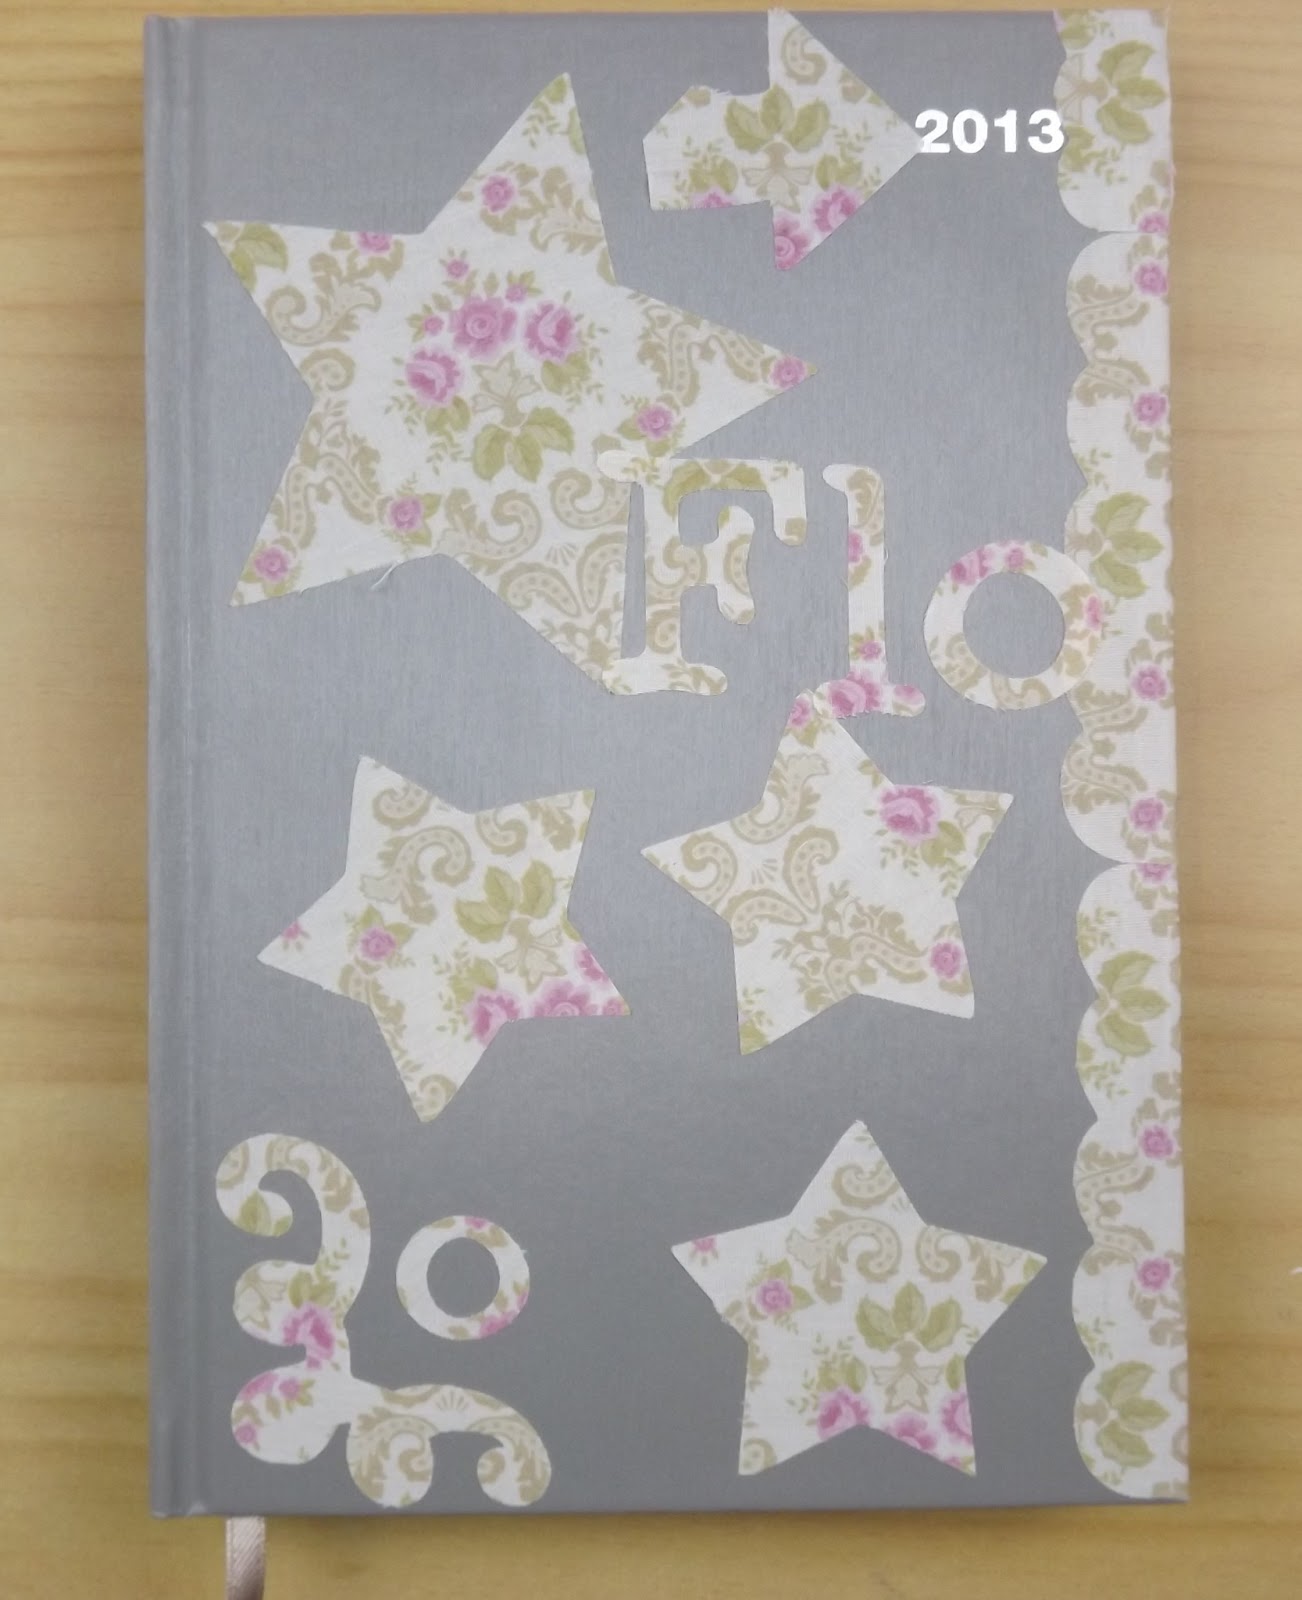
So many times I hear that the Cricut can't cut something. Now I'm not saying that the cricut can cut every material but there are a heap that it can cut if you just have the settings right. Recently I have heard the cricut can't cut xxx card stock but I have been cutting it for some time really well, Now a few days ago I was told it couldn't cut the DCWV Adhesive Fabric paper in fact they told me it doesn't cut with the cuttlebug or big shot either. Oh wow this was a definite challenge as any of you who know me know I have all these machines. The DCWV Adhesive Fabric paper comes in a stack of 12 sheets and when I bought it I wasn't sure what I was going to do with it but it looked pretty. Well the challenge was I had bought it to cut on the cricut and now I had to check to see if I could do just that. Well I loaded a very pretty sheet of the fabric paper and as it had a pattern I decided to cut it on centrpoint and used a star shape from the internal cart on the Cricut E2. I chose a 3.5 inch shape as that was what was in the machine when I turned it on and it suited what I wanted to do. I set the blade depth on 5 and changed the settings to speed 3 pressure 5 cut 2 and you can see the cut on the pic of my diary. I then decided I wanted more stars so cut some more at 2 inches. I cut my name and also a scroll. I did find that if I cut at 1.5 inches the material would pick up from the base so I didn't kiss cut due to it being fabric. the smaller sizes I will admit didn't cut as well but from 2 inches upward it did. Now to put it through the manual die cut machines. The thin dies like the nestabilities didn't cut the fabric well leaving areas where the cottons were still joined but the StampinUp small sizzlits of the hearts and the butterflys cut really well with no problem. The sizix thick dies that Tim Holts alterations were used cut well and there is a little fraying from the fabric that goes along with cutting fabric. But I would say this "fact" that the DCWV fabric paper can't be cut on the Cricut and Cuttlebug and Big shot is BUSTED.
Covered the notebook with the spare pieces left over then added some of the cuts. It looked so good I ran distress ink over it and this highlighted some of the edges. Can you see the hearts the butterflys the dress form. Its like a puzzle every time but I love it.
Subscribe to:
Posts (Atom)